How It Works
A Detailed Introduction to the CFPoly Platform
On CFPoly.io’s innovative platform there is no such thing as registration in a usual sense. You do not have to invent a username/enter email, come up with a complex password that you will, most likely, forget when you need it most. We are living in the age of blockchain, so why not leverage the benefits. The authentication mechanism in use is quite simple and requires very little interaction with the user – your authentication is your wallet, therefore, the whole process of, so to say, “registering an account” is narrowed down to connecting your wallet to this site.
Note: We are using our test net for the sake of this demonstration
Connecting your account
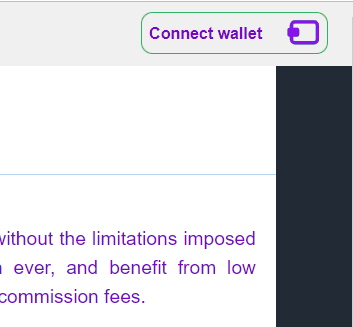
All you have to do is click on the “Connect wallet” link in the upper right corner of the page. Your wallet would then ask you whether you approve the connection. It may, as well, ask you to switch network (this is going to change soon as we add chains other than Polygon).

Switch to Polygon network
In case you do not have Polygon among configured networks, you will be given an option to add it automatically.
Once your wallet is connected, your account will be created automatically and its settings will be available through the account menu.
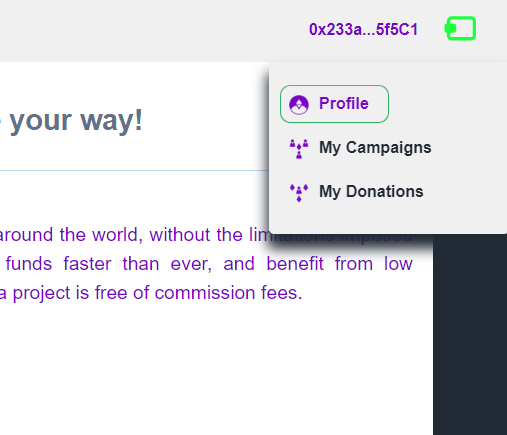
Access your profile via the account menu
You do not have to provide any personal data unless you are going to create a fundraising campaign. In which case we do require your email address so that we may communicate with you in case of need and keep you updated on the progress of your campaign. It is also suggested to specify your name or the name of your organization and bio so that potential backers would know whom they are helping (no need to mention the fact that people, most likely, will not back someone represented by just the blockchain address.
Campaign Creation
Fundraising campaign creation has never been easier. There is no need to purchase some weird named tokens, all you need to do is just submit a bit of information about the campaign to the governing smart contract by following a few simple steps.
The Campaign Creation Wizard is accessible via the “Create campaign” top menu. The first step is selection of the category (this information would be saved off-chain):
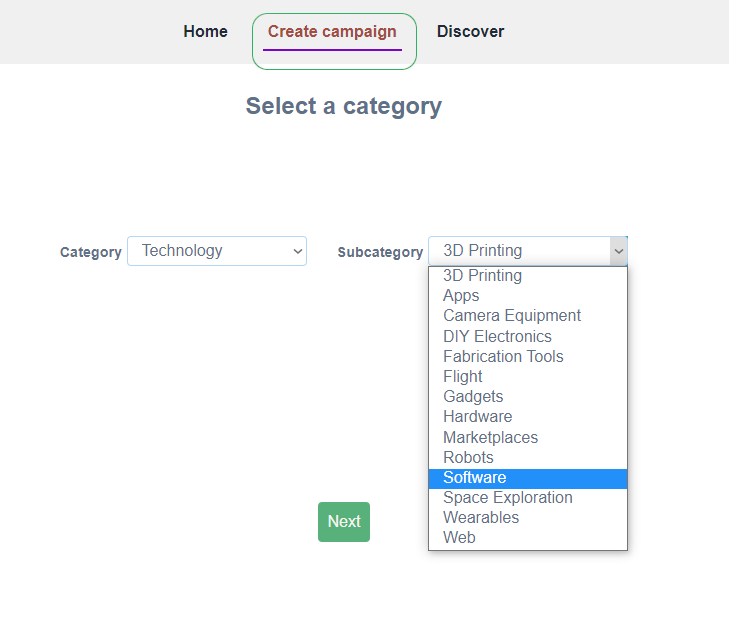
Category selection
In the following step, you will have to add some information on the fundraising campaign (this information would be saved off-chain too):
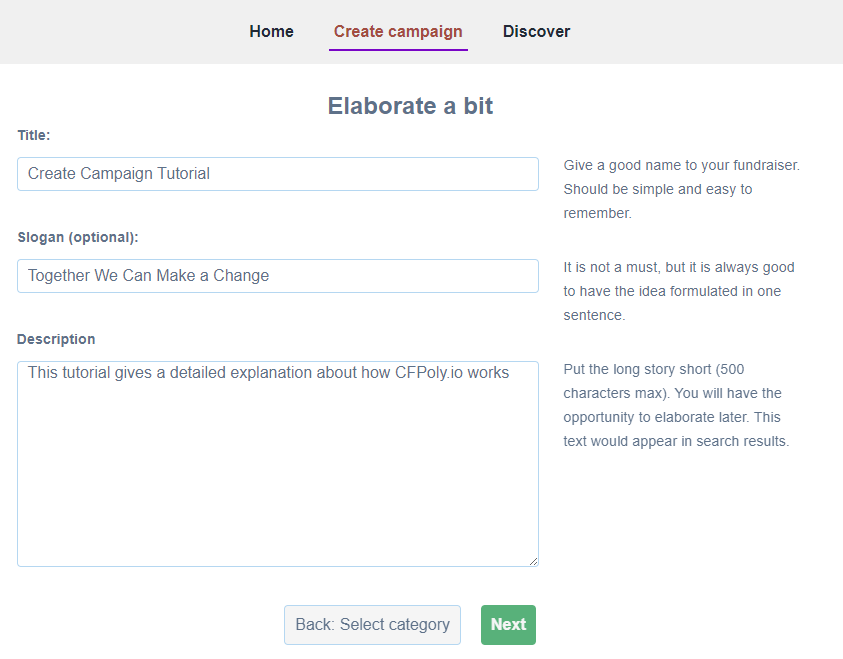
Enter campaign details
We are almost there, just two more steps are left. We need to specify the start and the end date for the campaign. Although, there is no limit on the duration of the campaign, it is suggested to make it 20 to 30 days. But, on software level, there are only two limitations regarding the start and the end date – they both must be in the future (even if the start date is within 2 minutes from now – just enough time to complete the campaign creation) and, which is obvious, the end date must be after than the start date. This information would be saved on blockchain (and in the database to reduce the amount of blockchain queries).
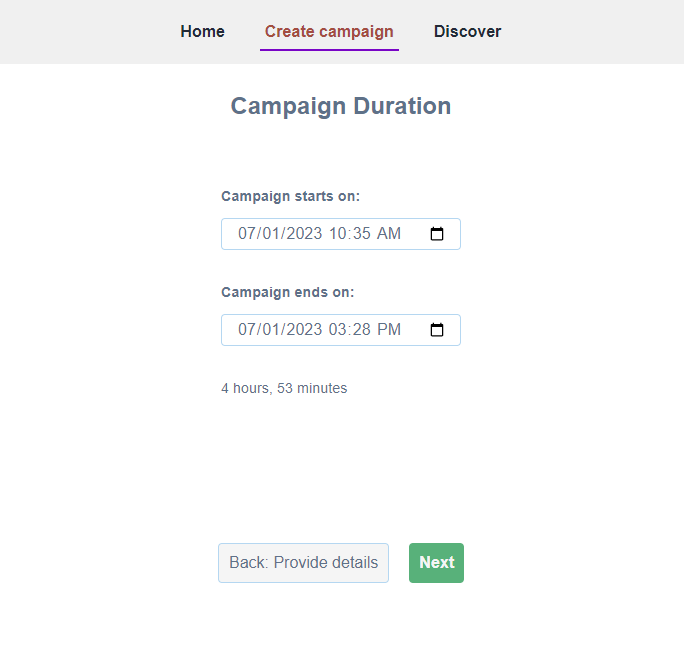
Specify campaign's start and end dates
And the finale step to take before the campaign is created, is to specify the goal amount (in MATIC only, for now). There is no limit as to what the amount may be except that it must be more than 10,000 Wei, as that is also the minimum allowed size of donation. This information would be saved on blockchain and to our database.
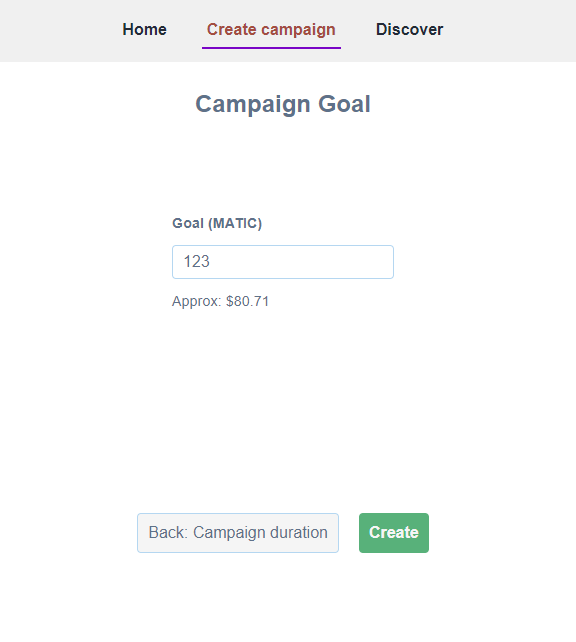
Specify the expected amount
Clicking on “Create” would launch the actual creation of the campaign on blockchain.
Campaign Creation Stages
The process of campaign creation on blockchain and on our website consists of a few stages that require very little to know user interaction at all.
Verification
This stage is required for the system to know that it is really you, who are posting the campaign on behalf of your account. If needed, you would be asked to verify that by signing a message with your wallet.
Submission to Blockchain
This is when the information regarding your campaign is being posted to blockchain. Naturally, all changes made to blockchain require Gas Fee to be paid. We imply no other fees on campaign creation, so the wallet would only require your action to pay the Gas Fee.
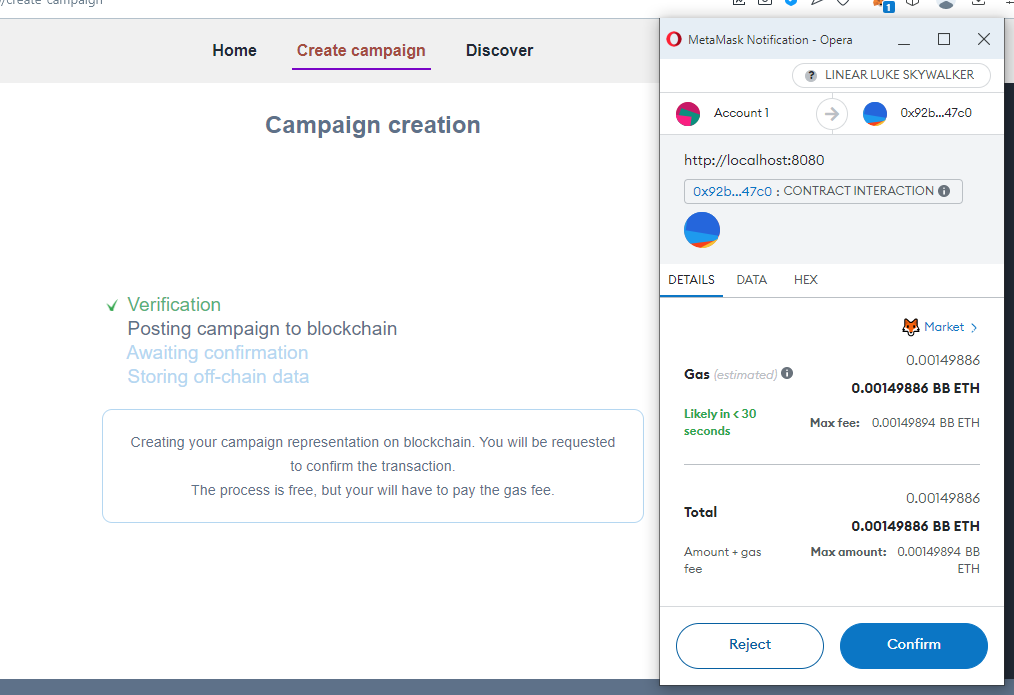
Posting campaign to blockchain
As you may see on the above screenshot, the Gas Fee of 0.00149886 ETH needs to be paid by the user posting the campaign. No additional payments beside this.
The process is canceled if the transaction fails (for any reason – whether you rejected the Gas Fee payment, or there’s been a problem with the blockchain).
Disclaimer: It is important to
emphasize, that any interaction with the blockchain is performed at your own risk and we bare no responsibility
whatsoever for the outcome of such transactions.
Another important thing to mention – you may not have more than 1 campaign at time:
You may only have one campaign at a time
Storing the Off-Chain Data
Once the transaction is confirmed, we store the off-chain data to our database. And, in order to do this, we require you to sign the data with your wallet (the operation is free):
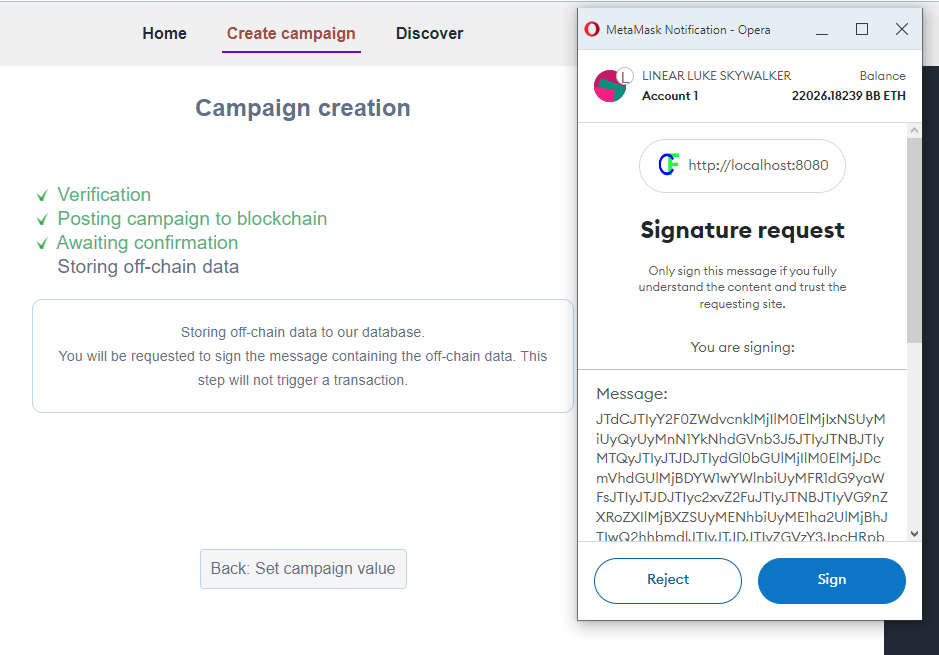
Signing the off-chain data with your wallet so that we know it's you
Completing Campaign Creation
Once the data has been successfully stored to blockchain and our server, you would be invited to add the rest of the information to your campaign:
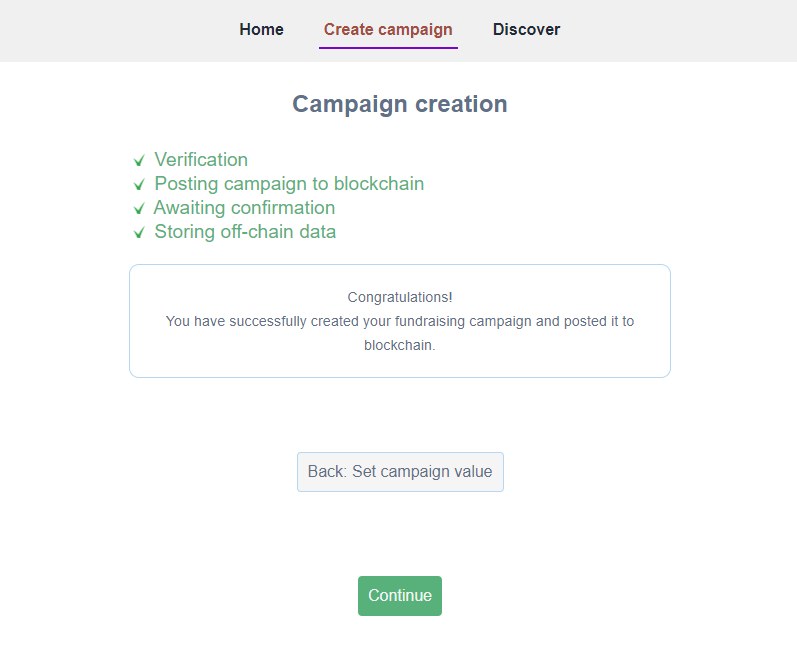
Your campaign has been successfully posted
Clicking on “Continue” here would redirect you to the campaign settings page.
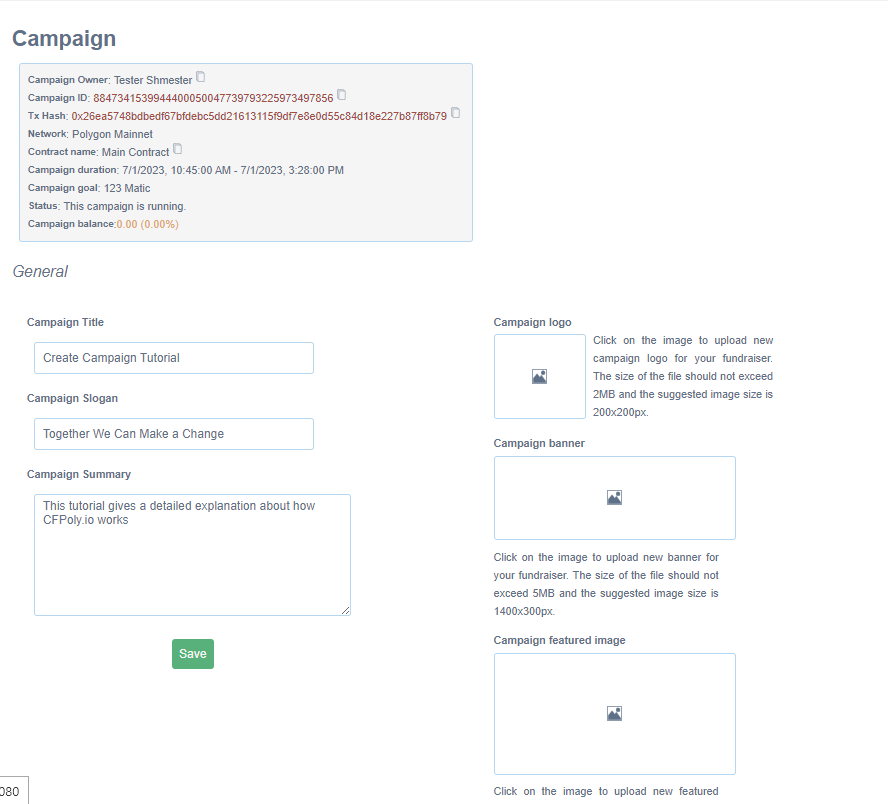
Campaign Settings
Here you may add whatever information is relevant to your campaign, including social media links and images.
Campaign settings
Once you’re done entering the details, click on any of the two “Save” buttons and you’re set.
Click on the campaign ID in the header to visit the campaign’s page:
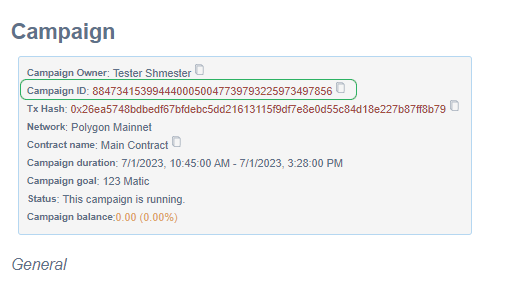
Go to the campaign's page
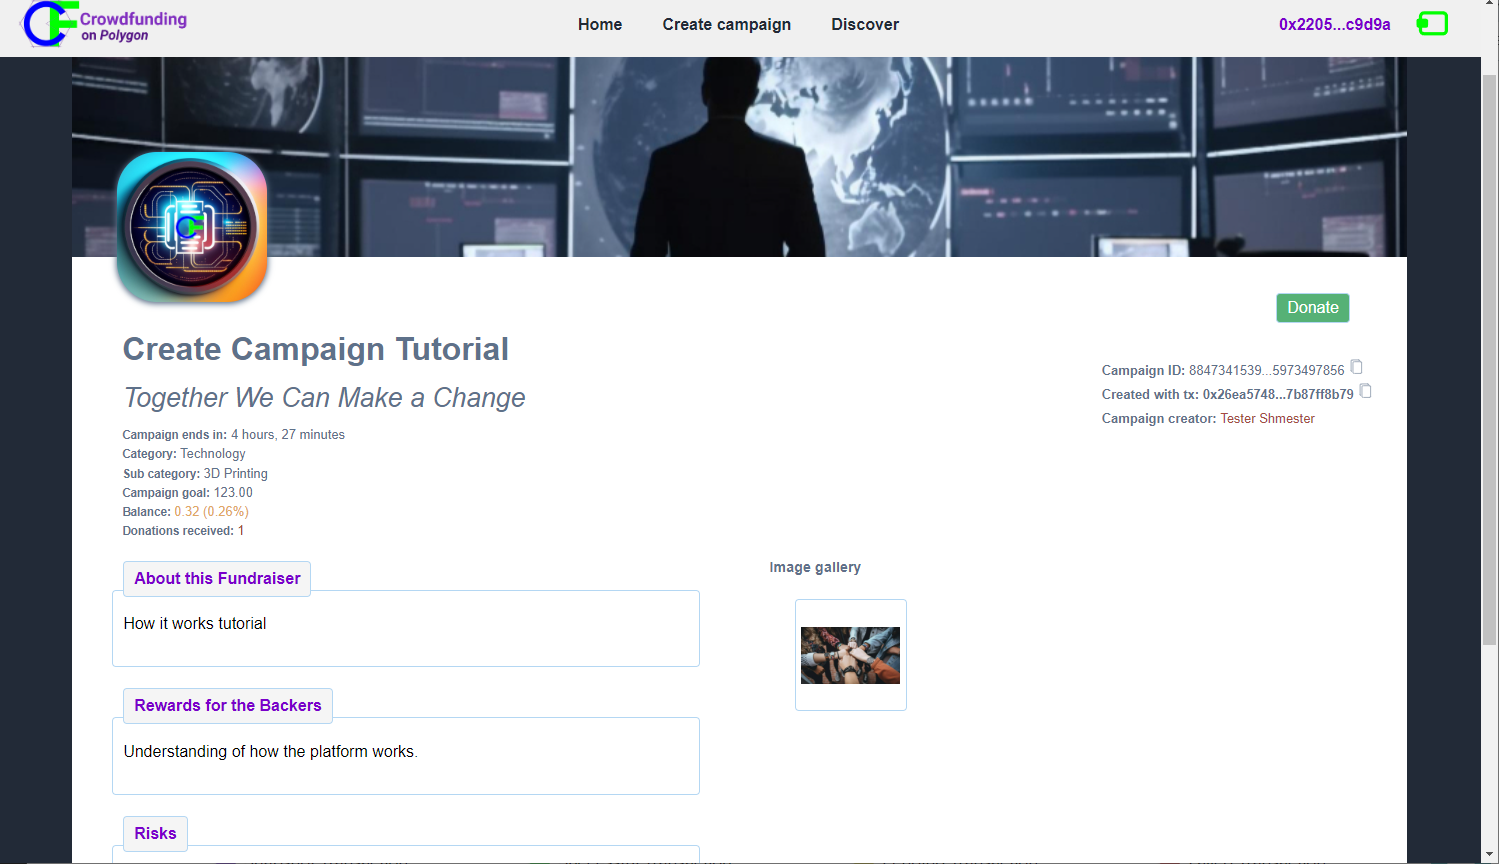
Campaign's page
Since now on, you may locate your campaign by going to the upper-right corner user menu and clicking on “My Campaigns.”
Simple and Easy Donation Process
Just like everything on blockchain, the process of sending a donation is simple and easy. Once on the page of the campaign of your choice, click on the “Donate” button in the upper-right corner of the page:

Sending donation
You would then be prompted to specify the amount (the amount is in tokens of the chain to which the campaign was published).
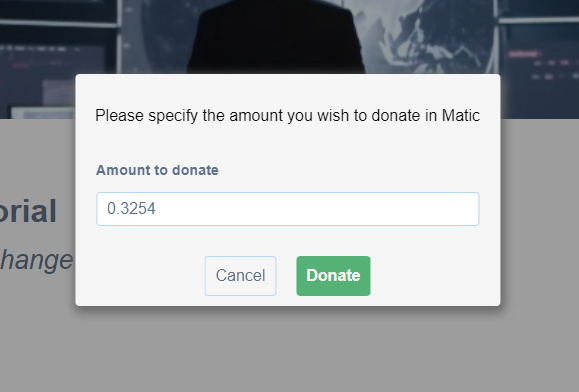
Specify the amount you wish to donate
Once the amount is set – click on “Donate”. Naturally, your wallet would ask for confirmation:
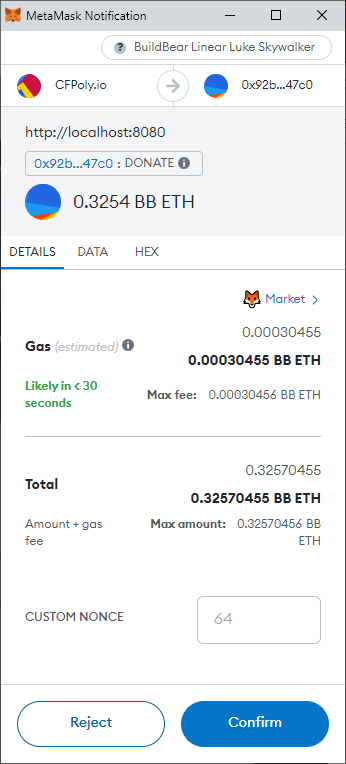
Confirm your donation
At last, once the donation is sent to the blockchain and its metadata is saved to our database, you would see the “Donation received” message:
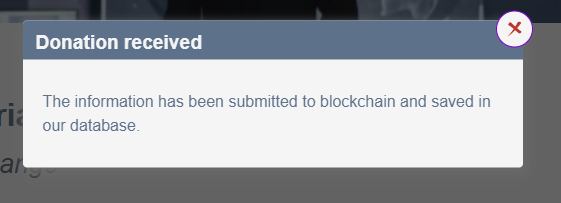
Donation received
As a backer you may see all your donations by going to the profile menu in the upper-right corner and selecting “My Donations.”
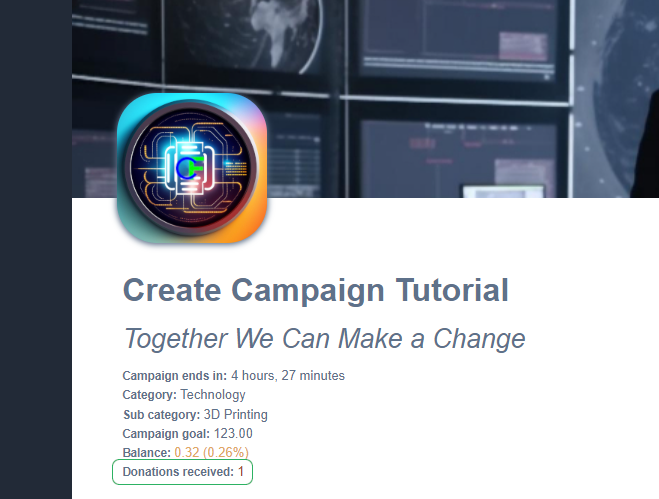
On the other hand, would you, as a creator, want to browse through the donations made to your campaign, you should open your campaign’s page and click on the amount of donations entry in the header:
Browse through donations
Donation Revocation
As long as the campaign you have donated to is running (has not ended, been closed, or dissolved) you, as a backer, have the option to revoke your donation in case your mind has changed.
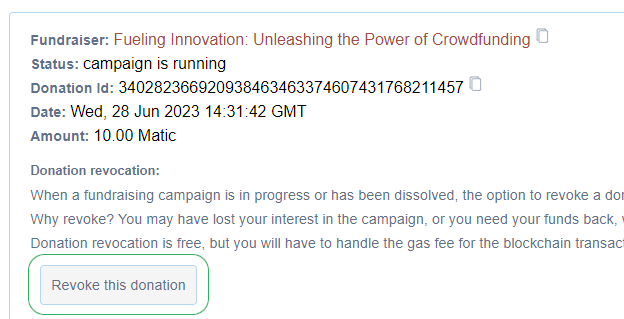
Donation revocation
Click on the “Revoke this donation” button and your donation would be canceled while all your donated funds would be deposited back to your wallet. However, keep in mind that such operation, as it would still have been performed on blockchain, would require payment of the Gas Fee.